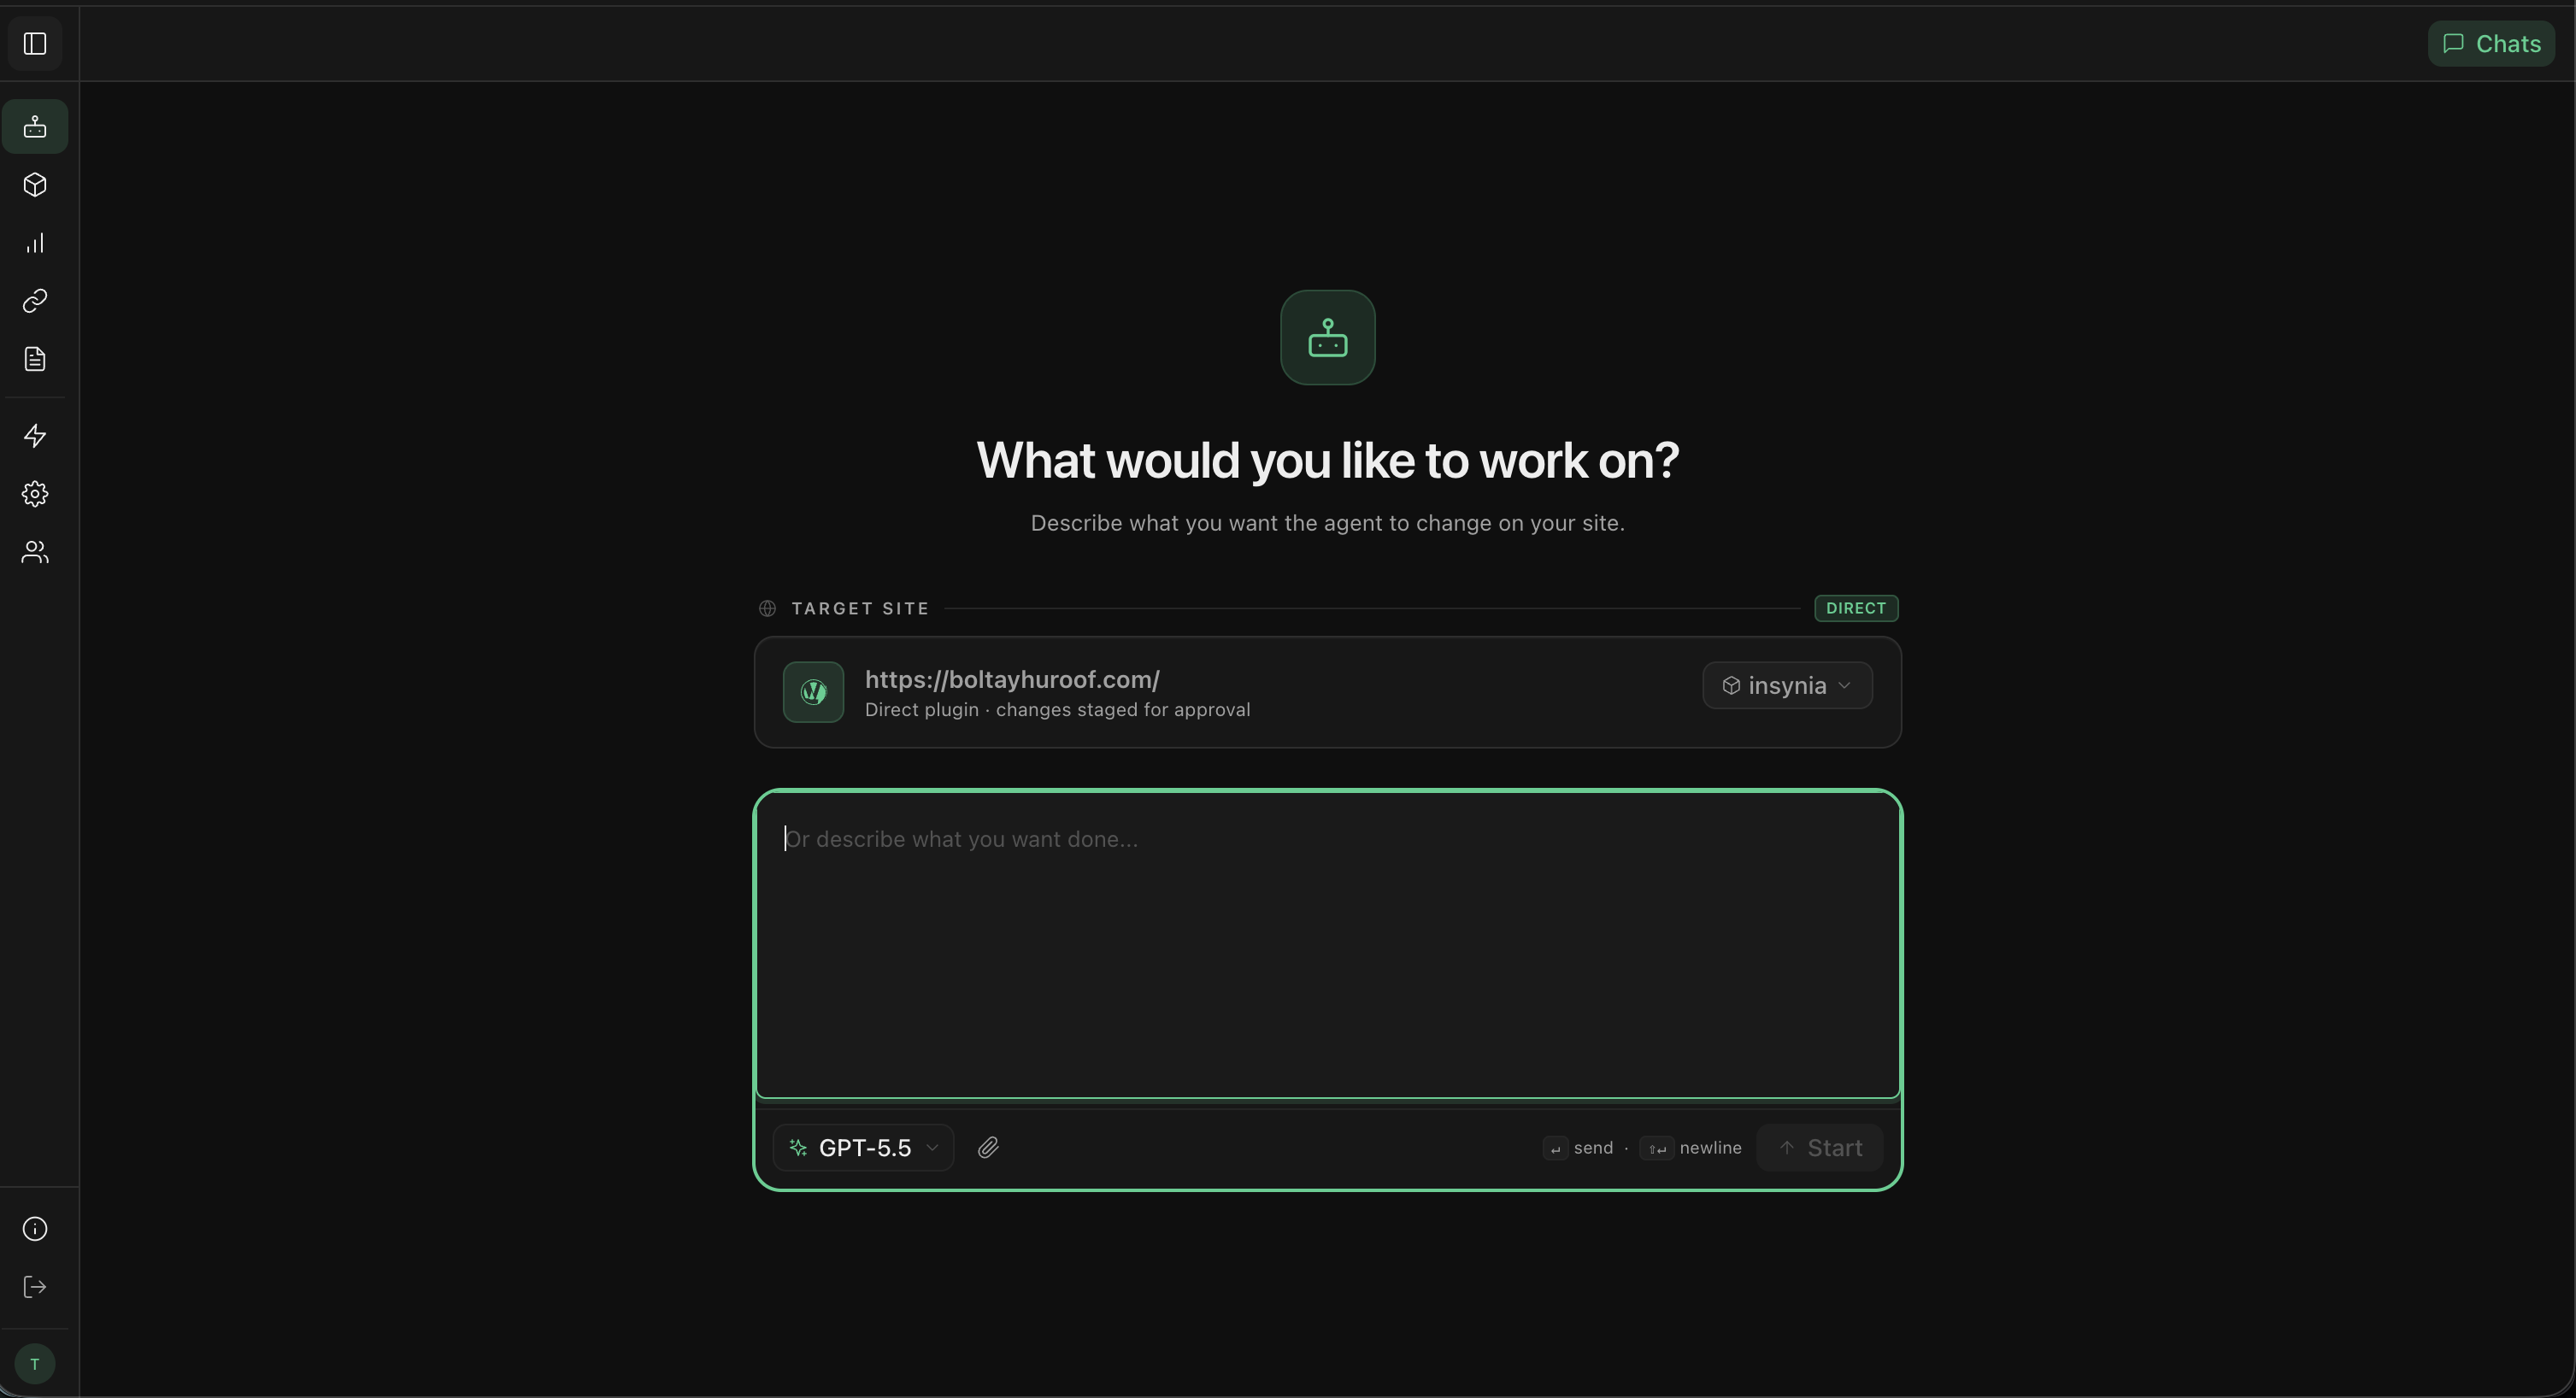
1. Create your Insynia account and choose WordPress
Sign up for Insynia to get started. During onboarding, pick WordPress in the connection screen so Insynia prepares the correct workflow.
- Create a new workspace for the website you want to redesign.
- Confirm you are connecting the production website only if you are ready to apply live design changes.
2. Download the Insynia WordPress theme
Download the latest Insynia theme ZIP.
Keep the file as .zip and do not extract it before uploading to WordPress.
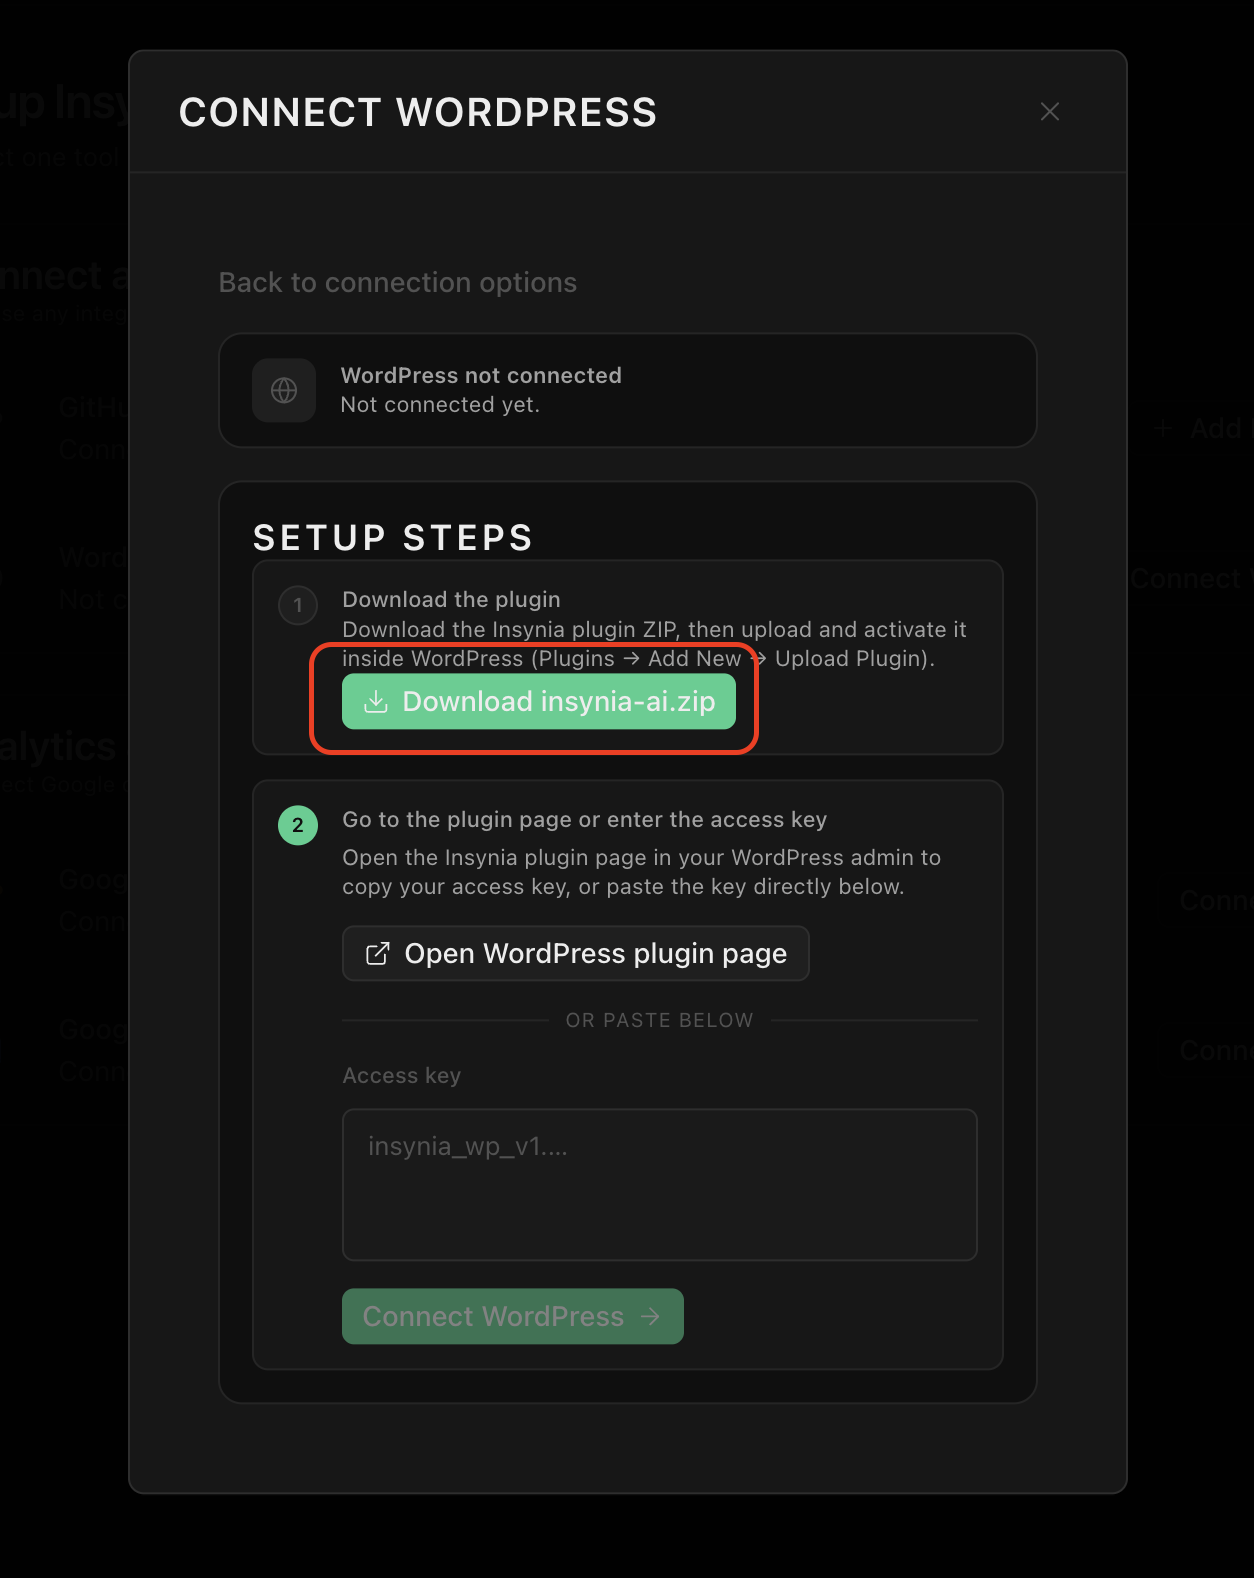
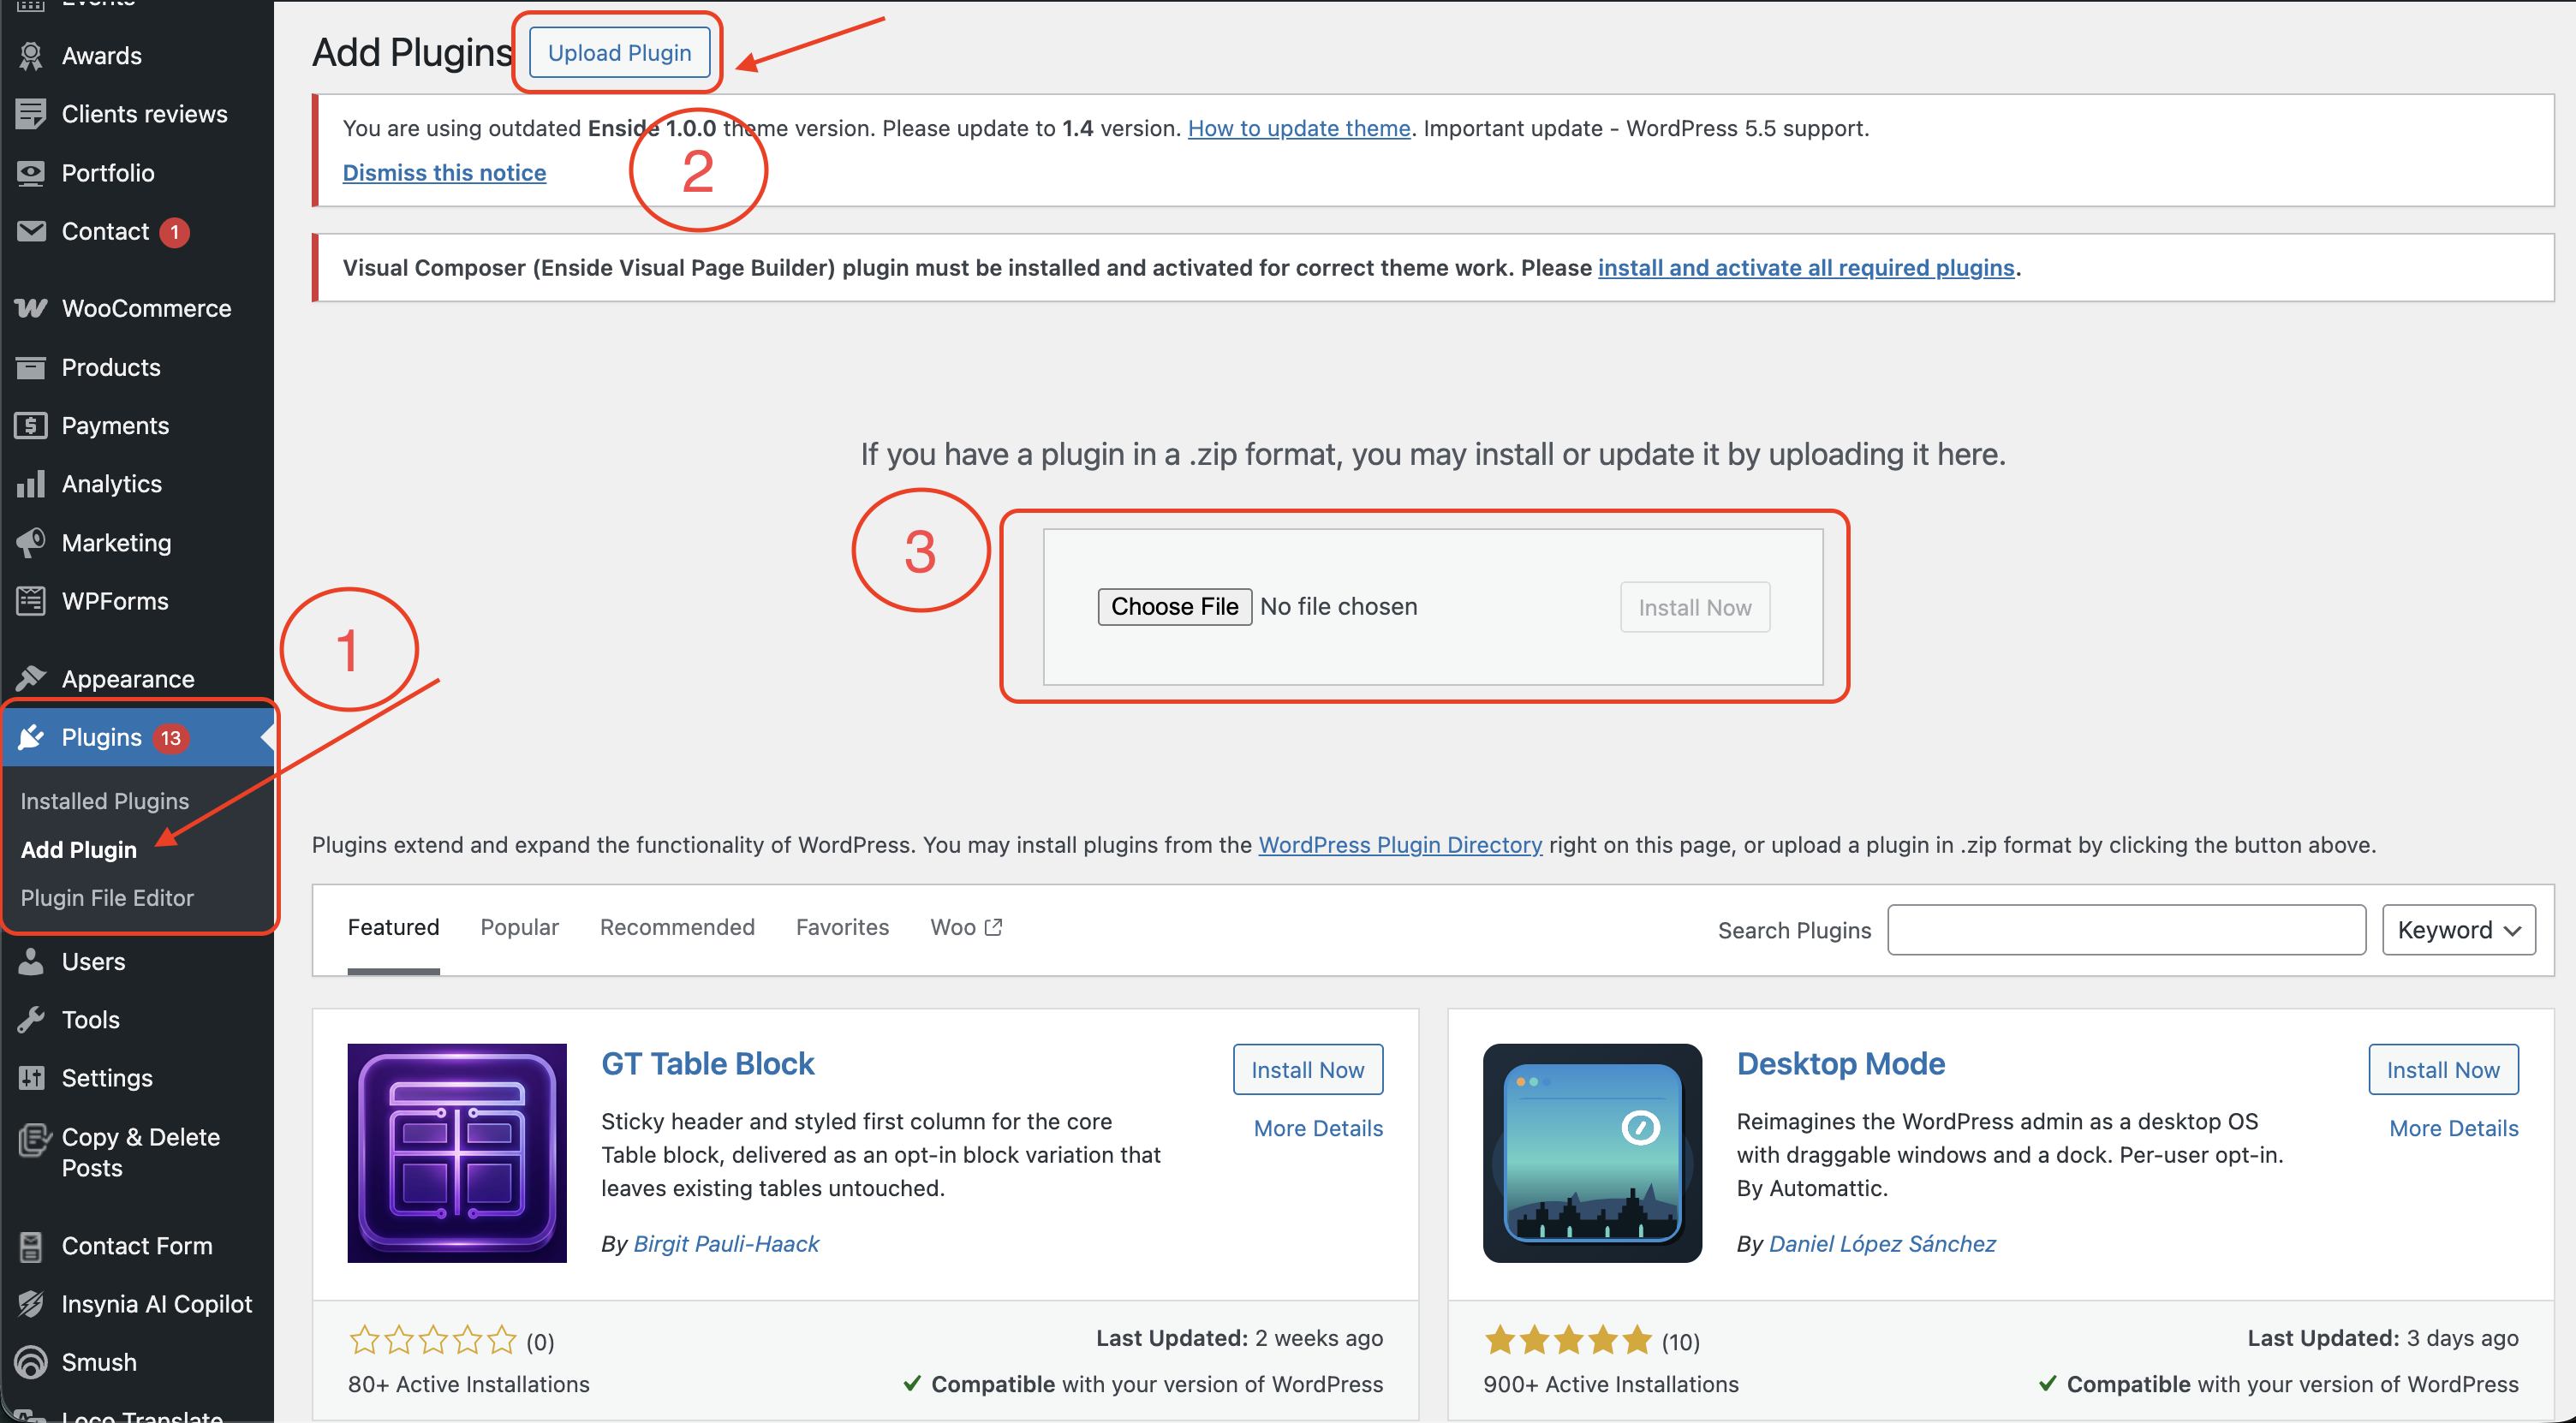
3. Upload and activate the theme in WordPress
In your WordPress admin panel, go to Appearance → Themes → Add New Theme → Upload Theme. Select the downloaded ZIP and click Install Now, then click Activate.
- Use an admin account so activation succeeds immediately.
- If prompted, allow recommended plugins required by the theme.
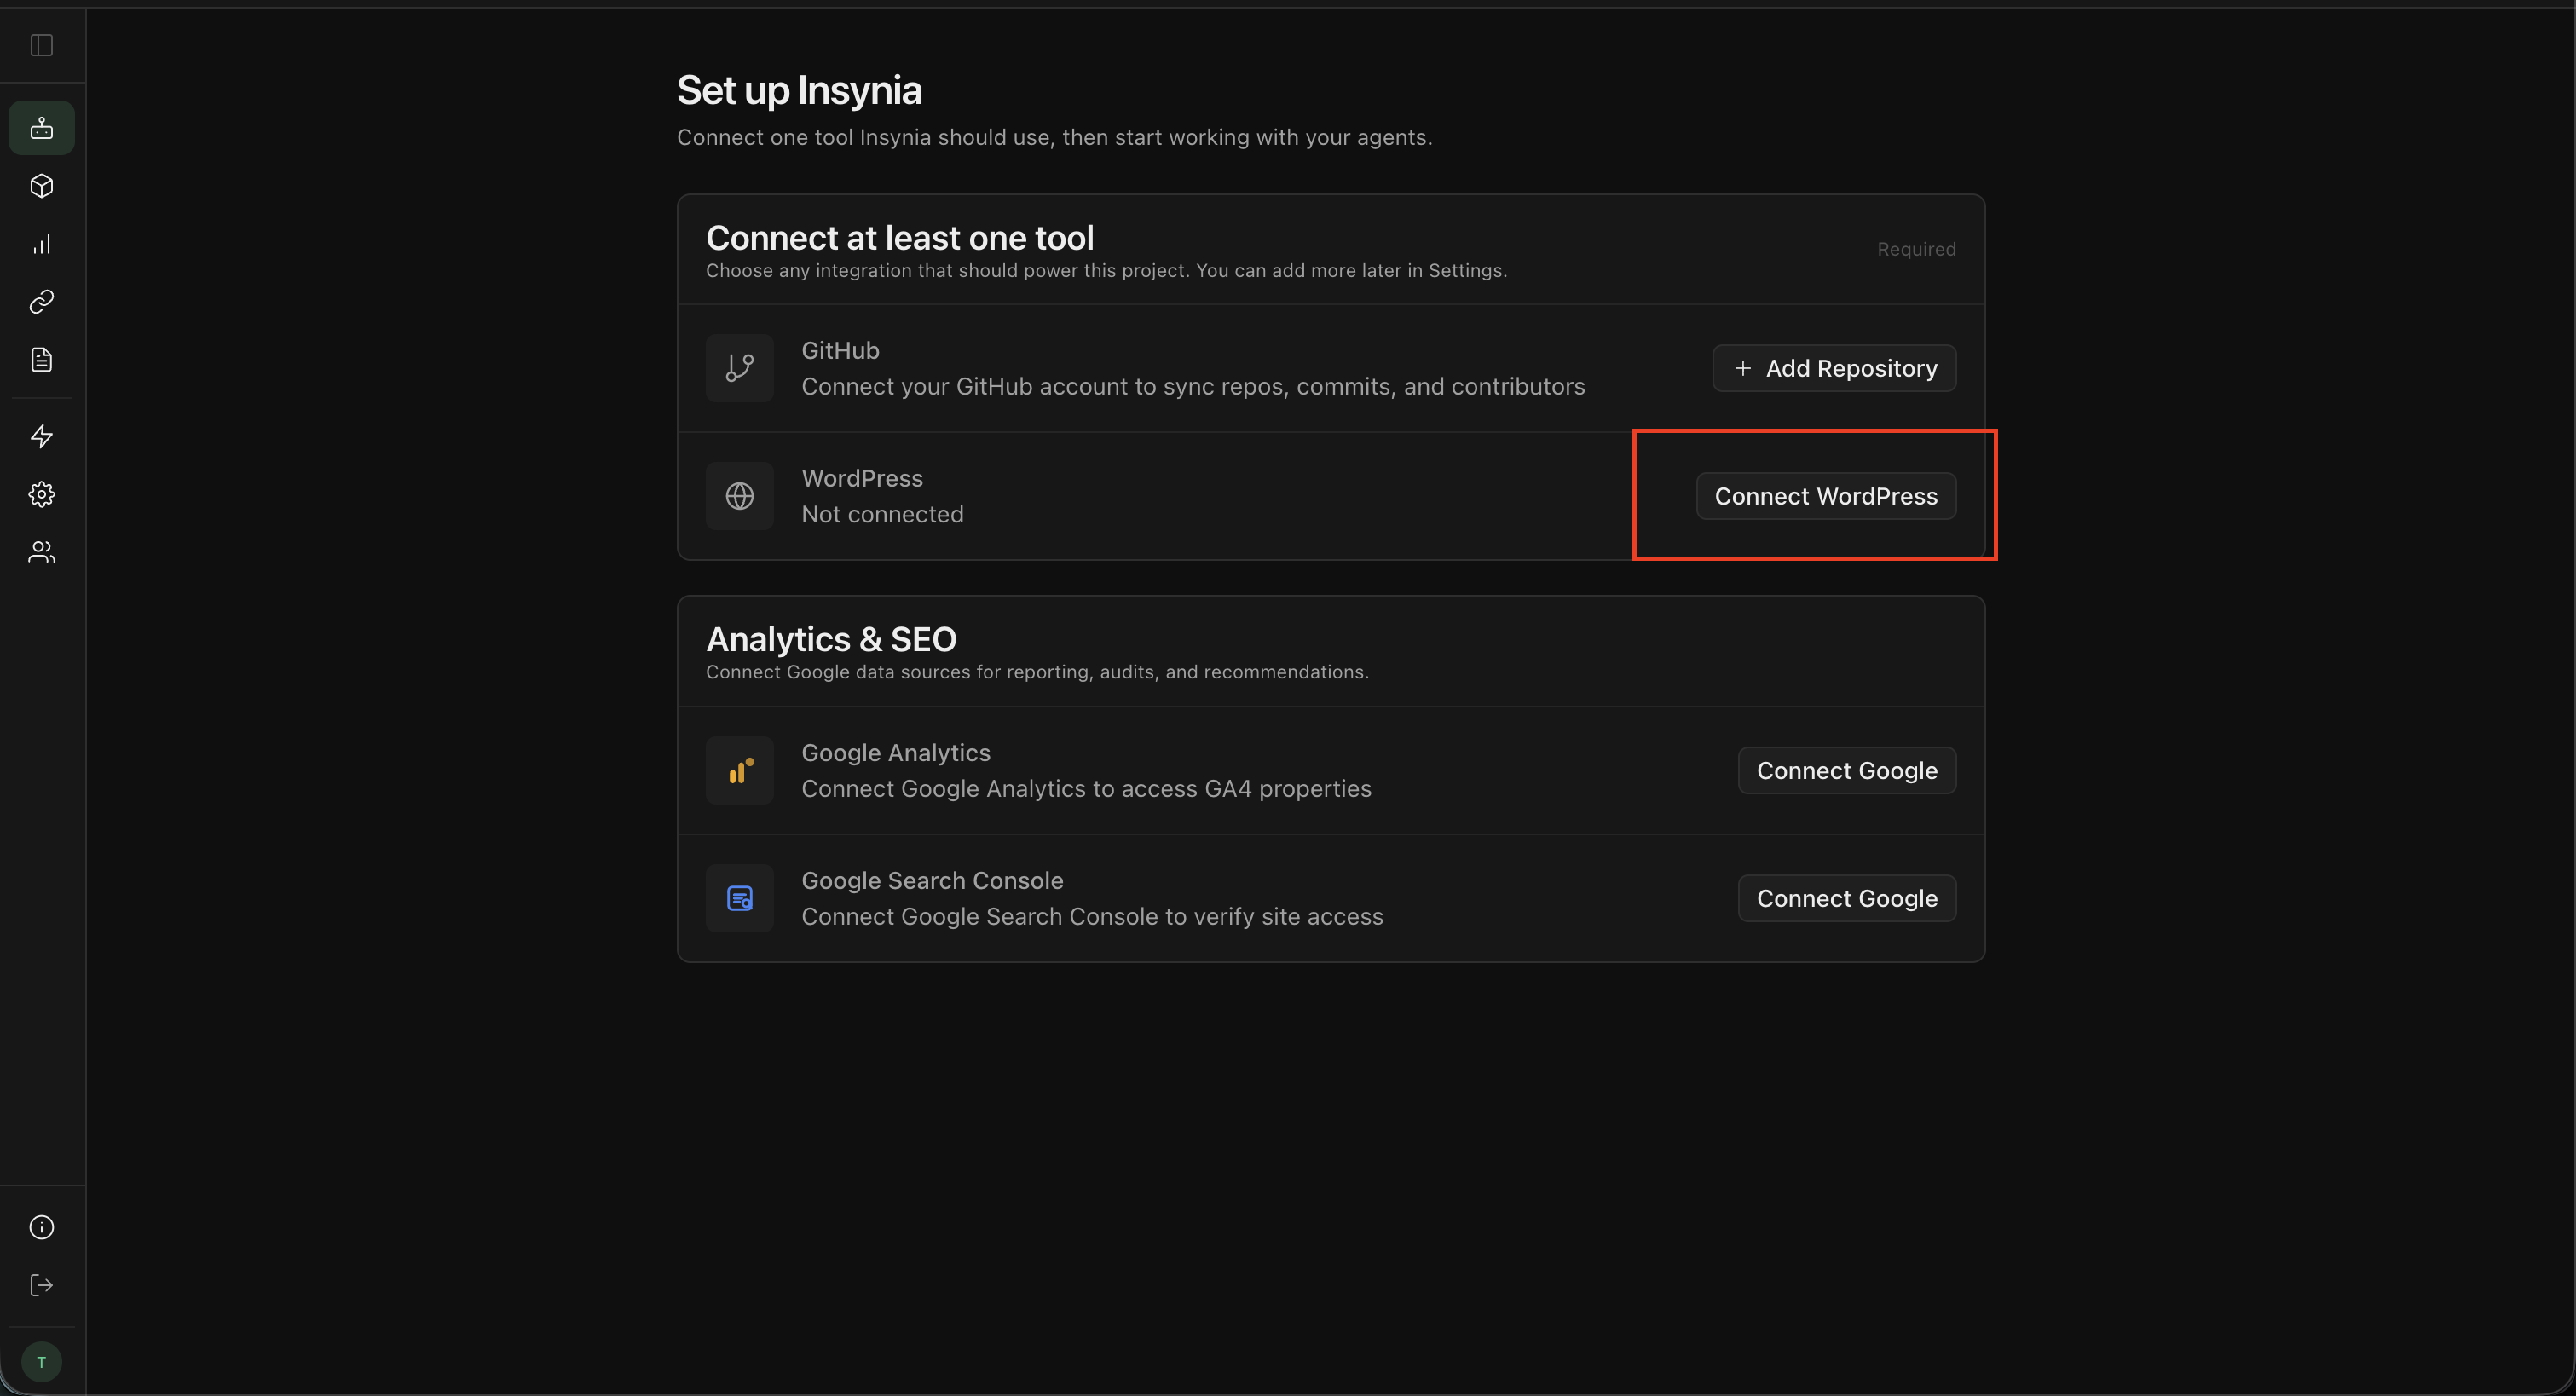
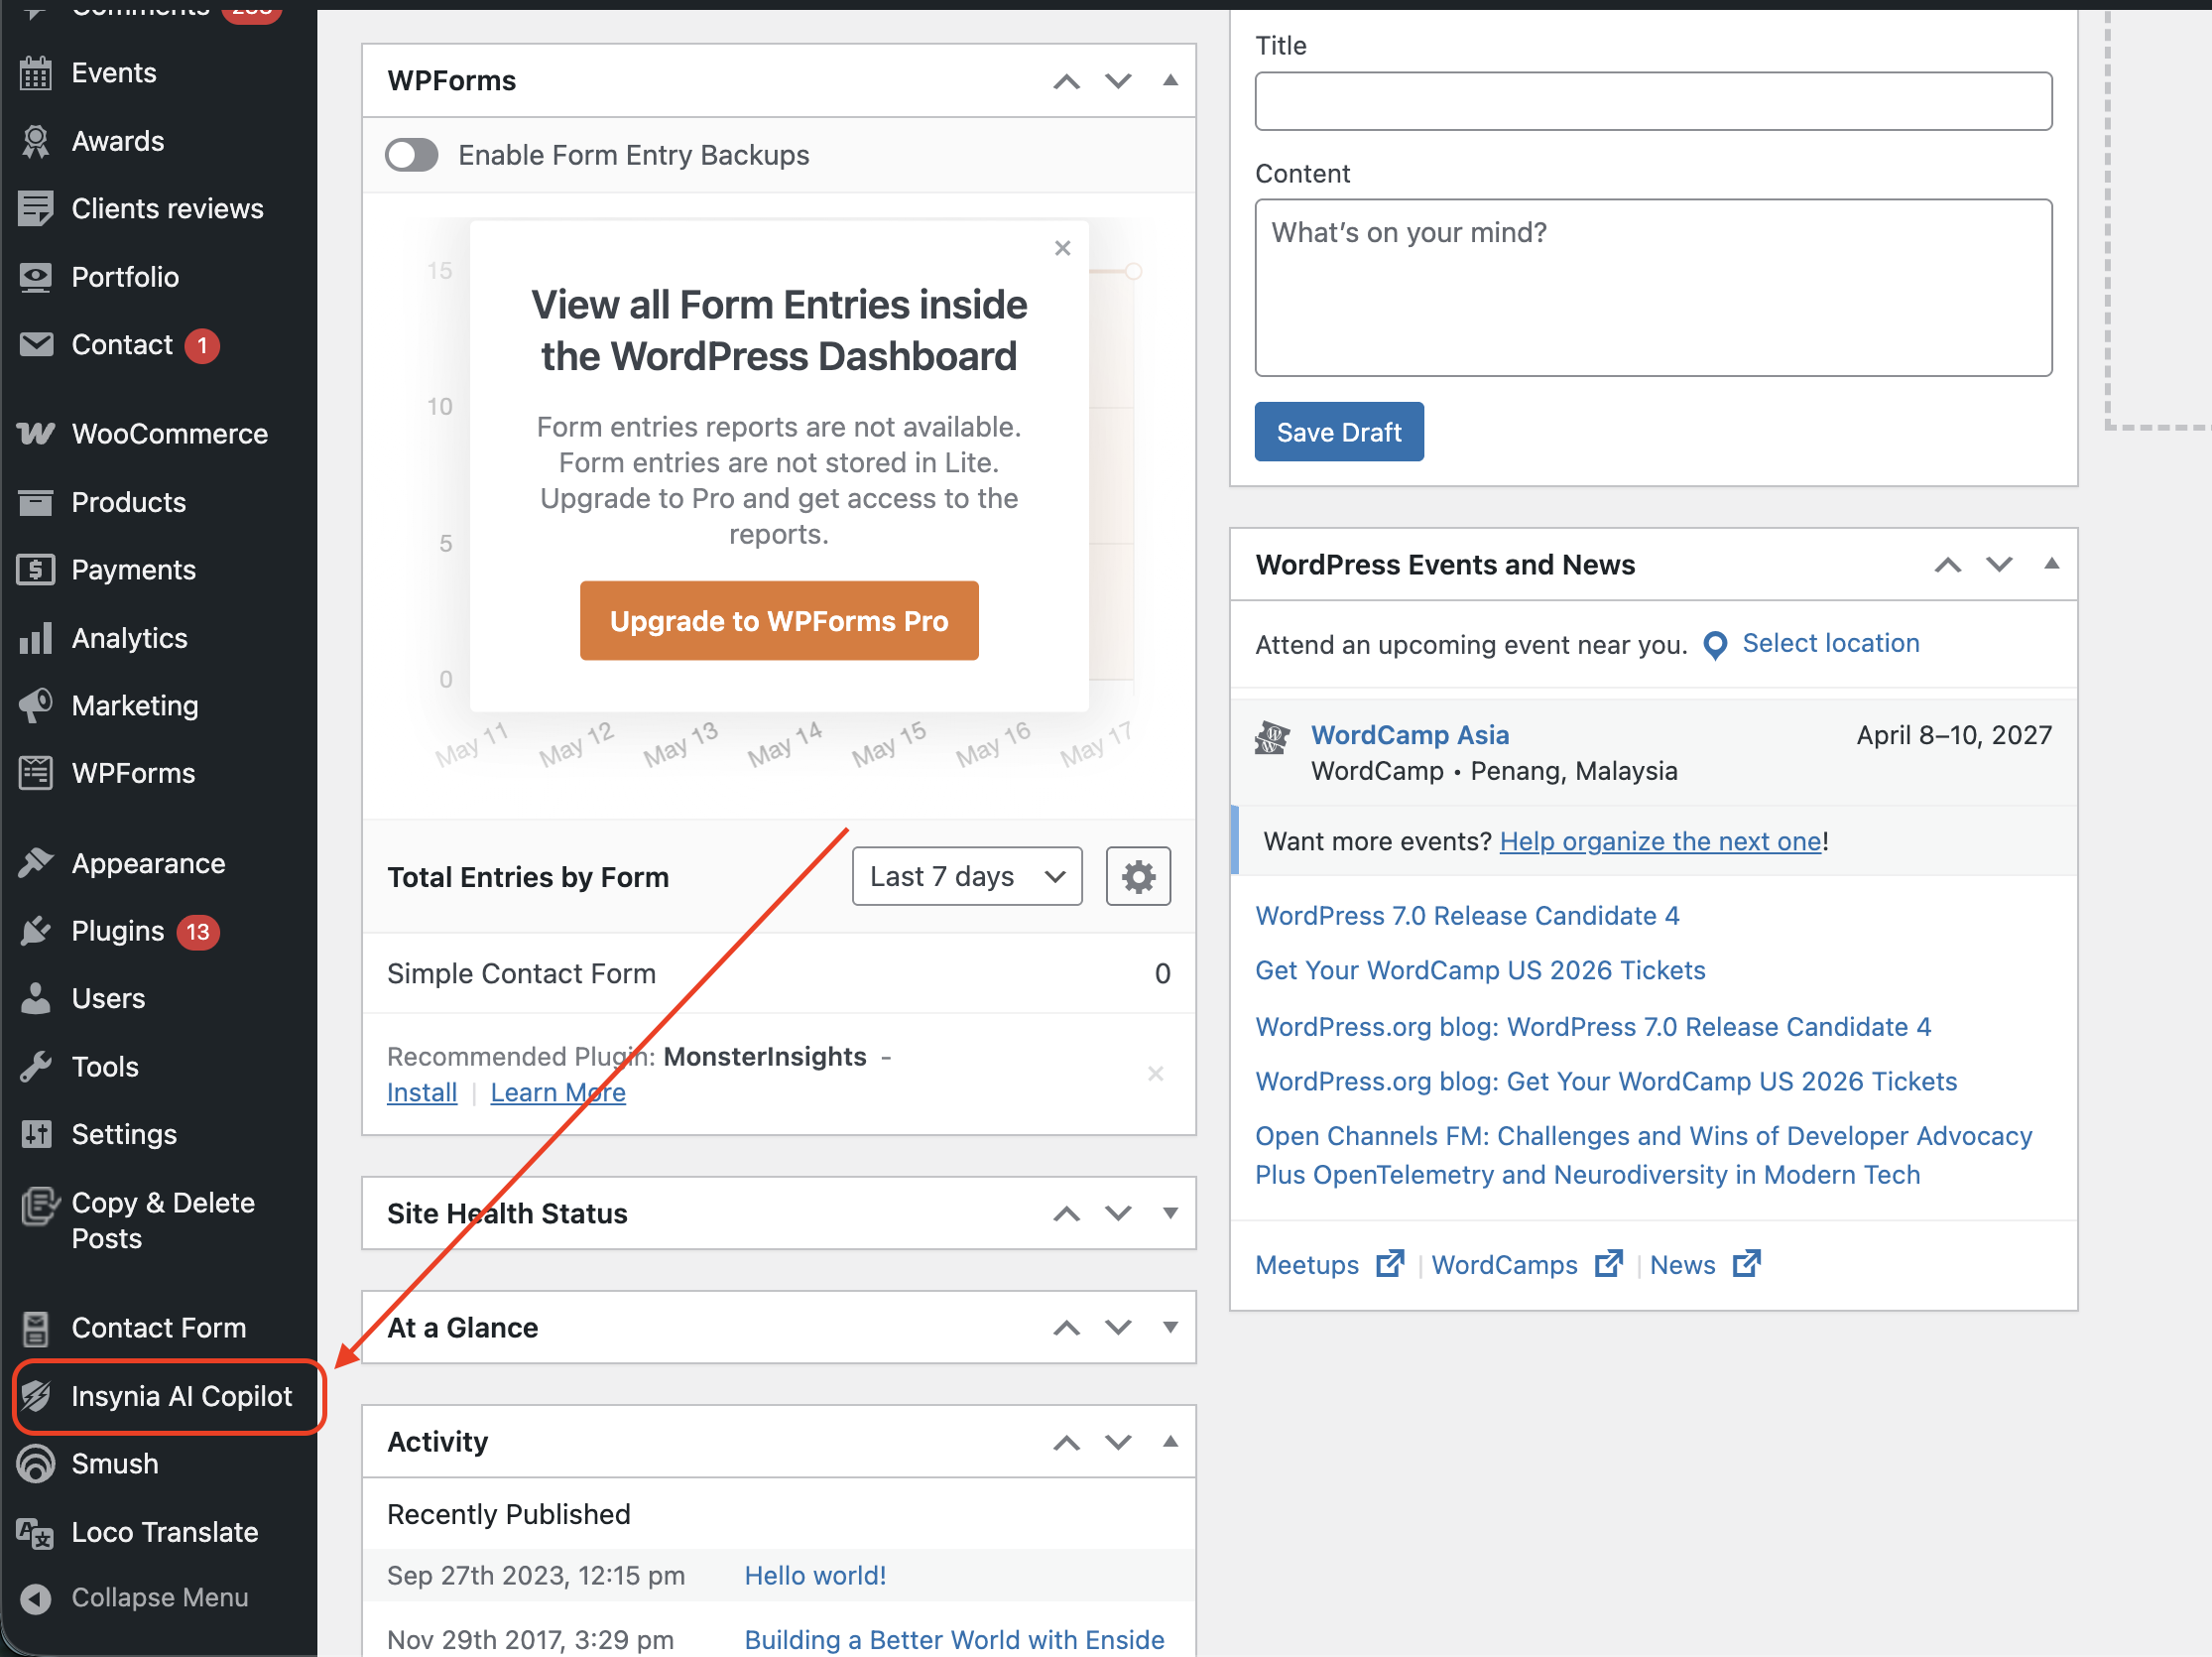
4. Open the Insynia plugin from your WordPress sidebar
After activation, find Insynia in the left admin sidebar. Open it to access your project connection panel and integration token.
If you do not see the menu item, verify that the Insynia plugin is installed and active under Plugins.
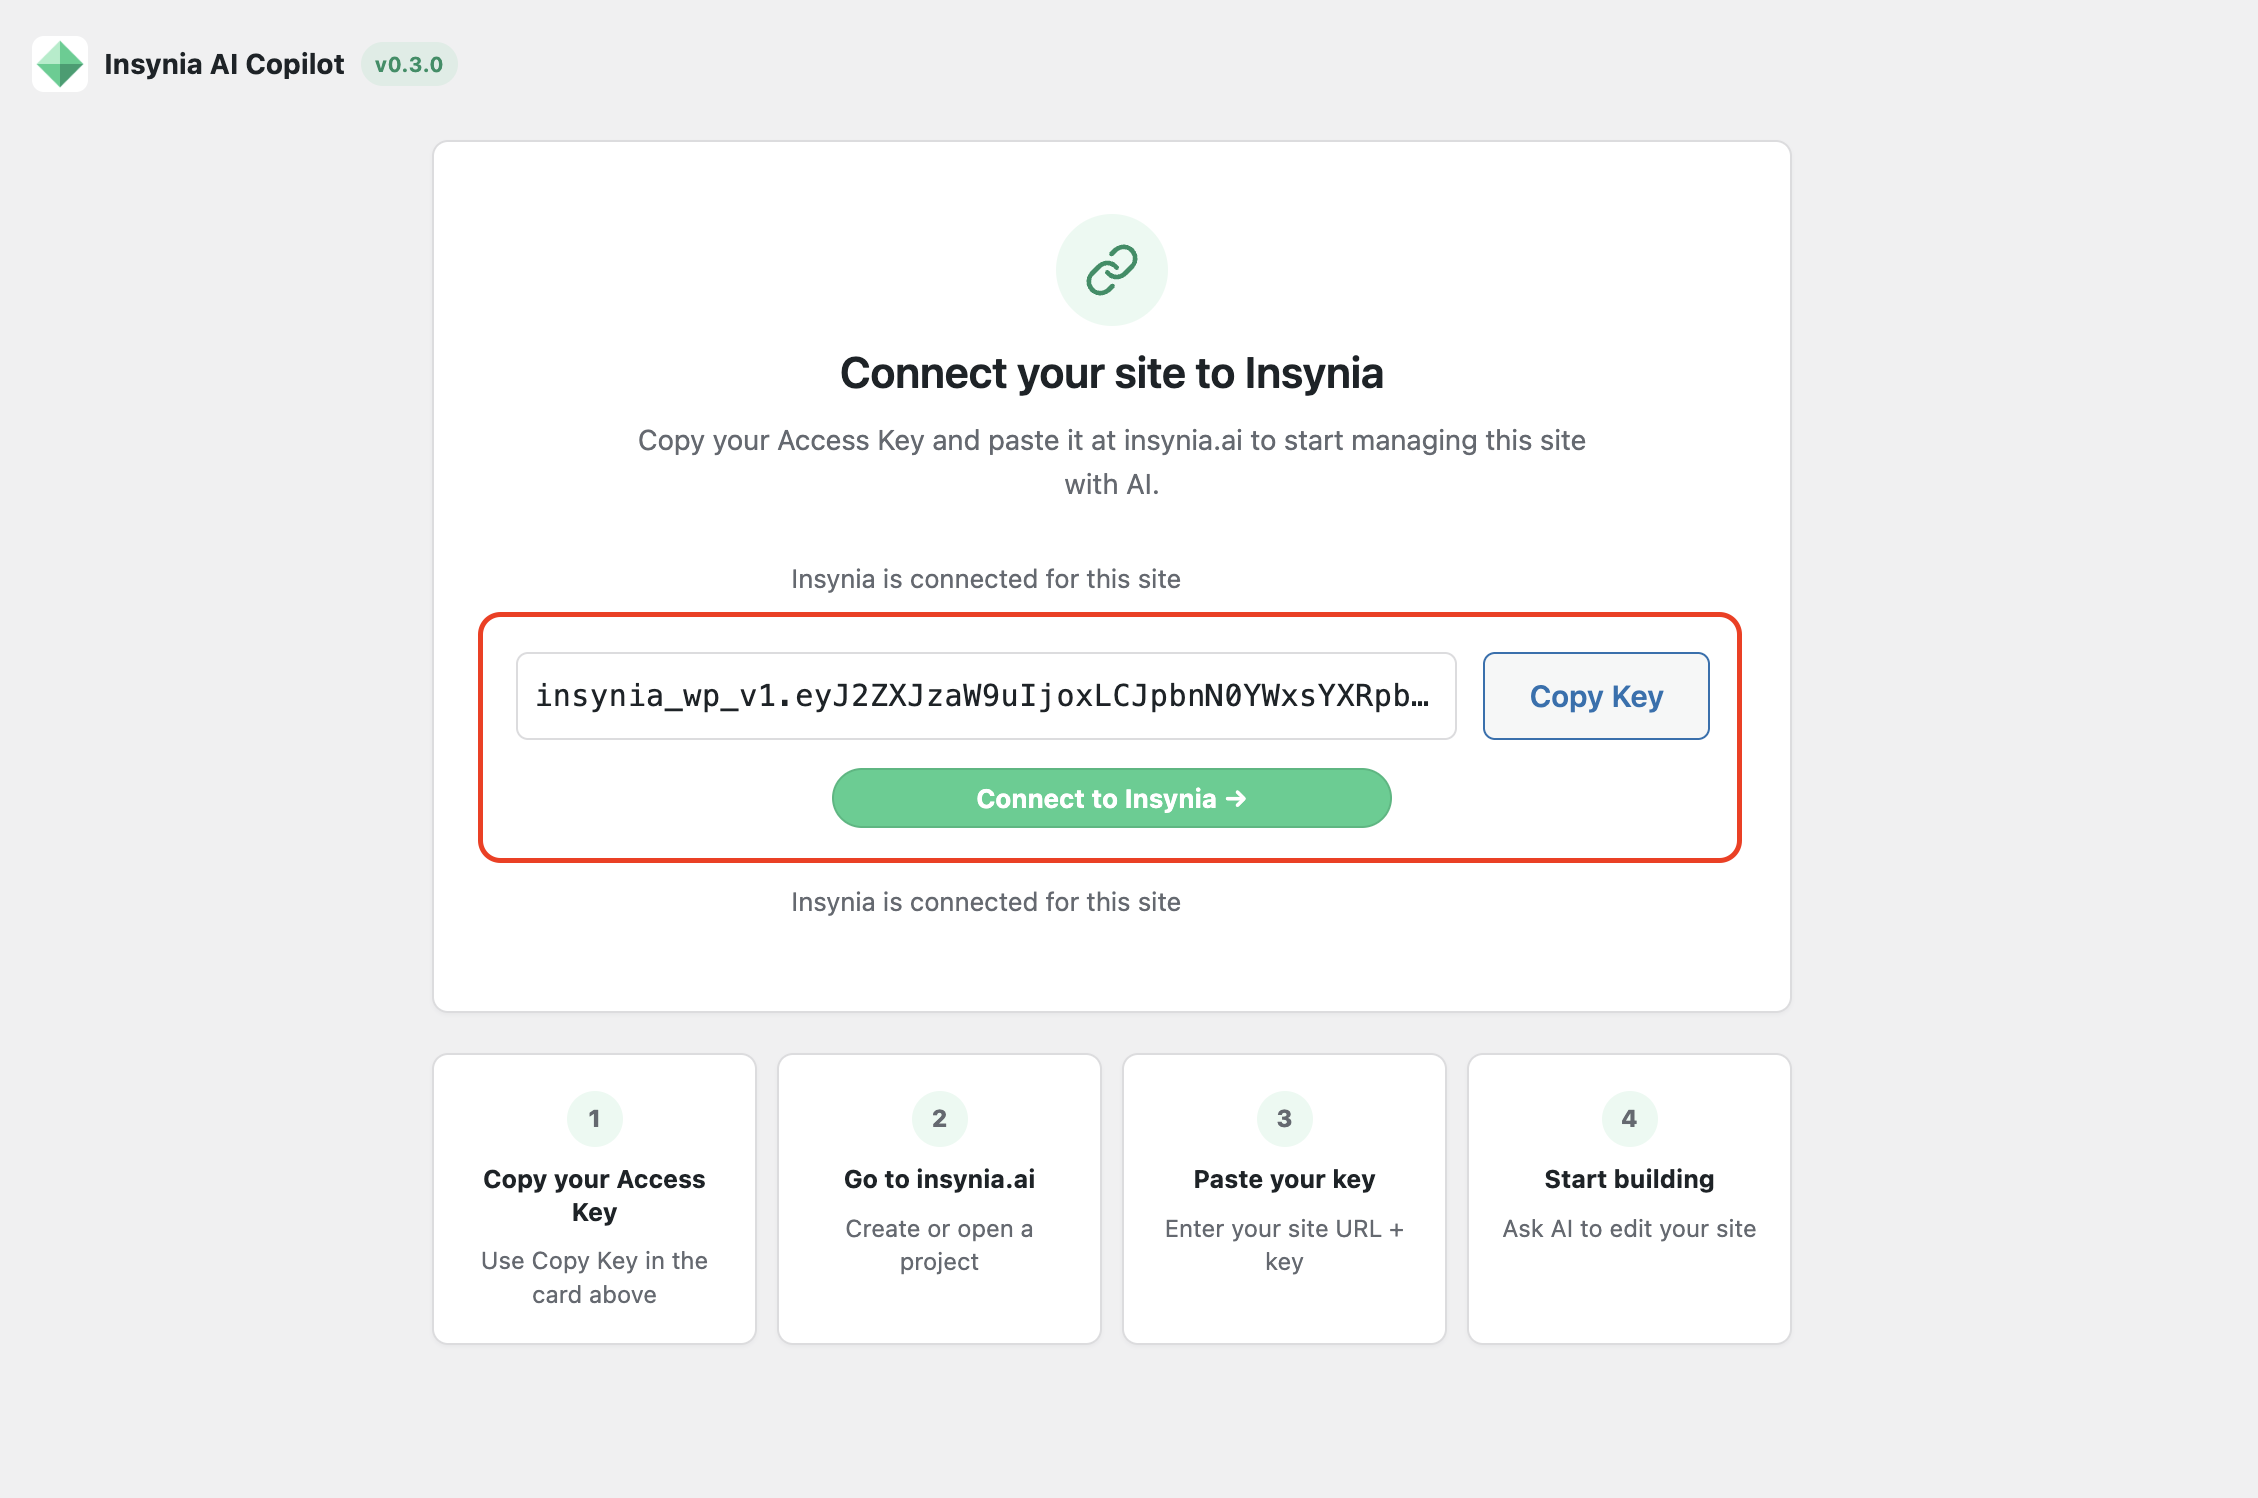
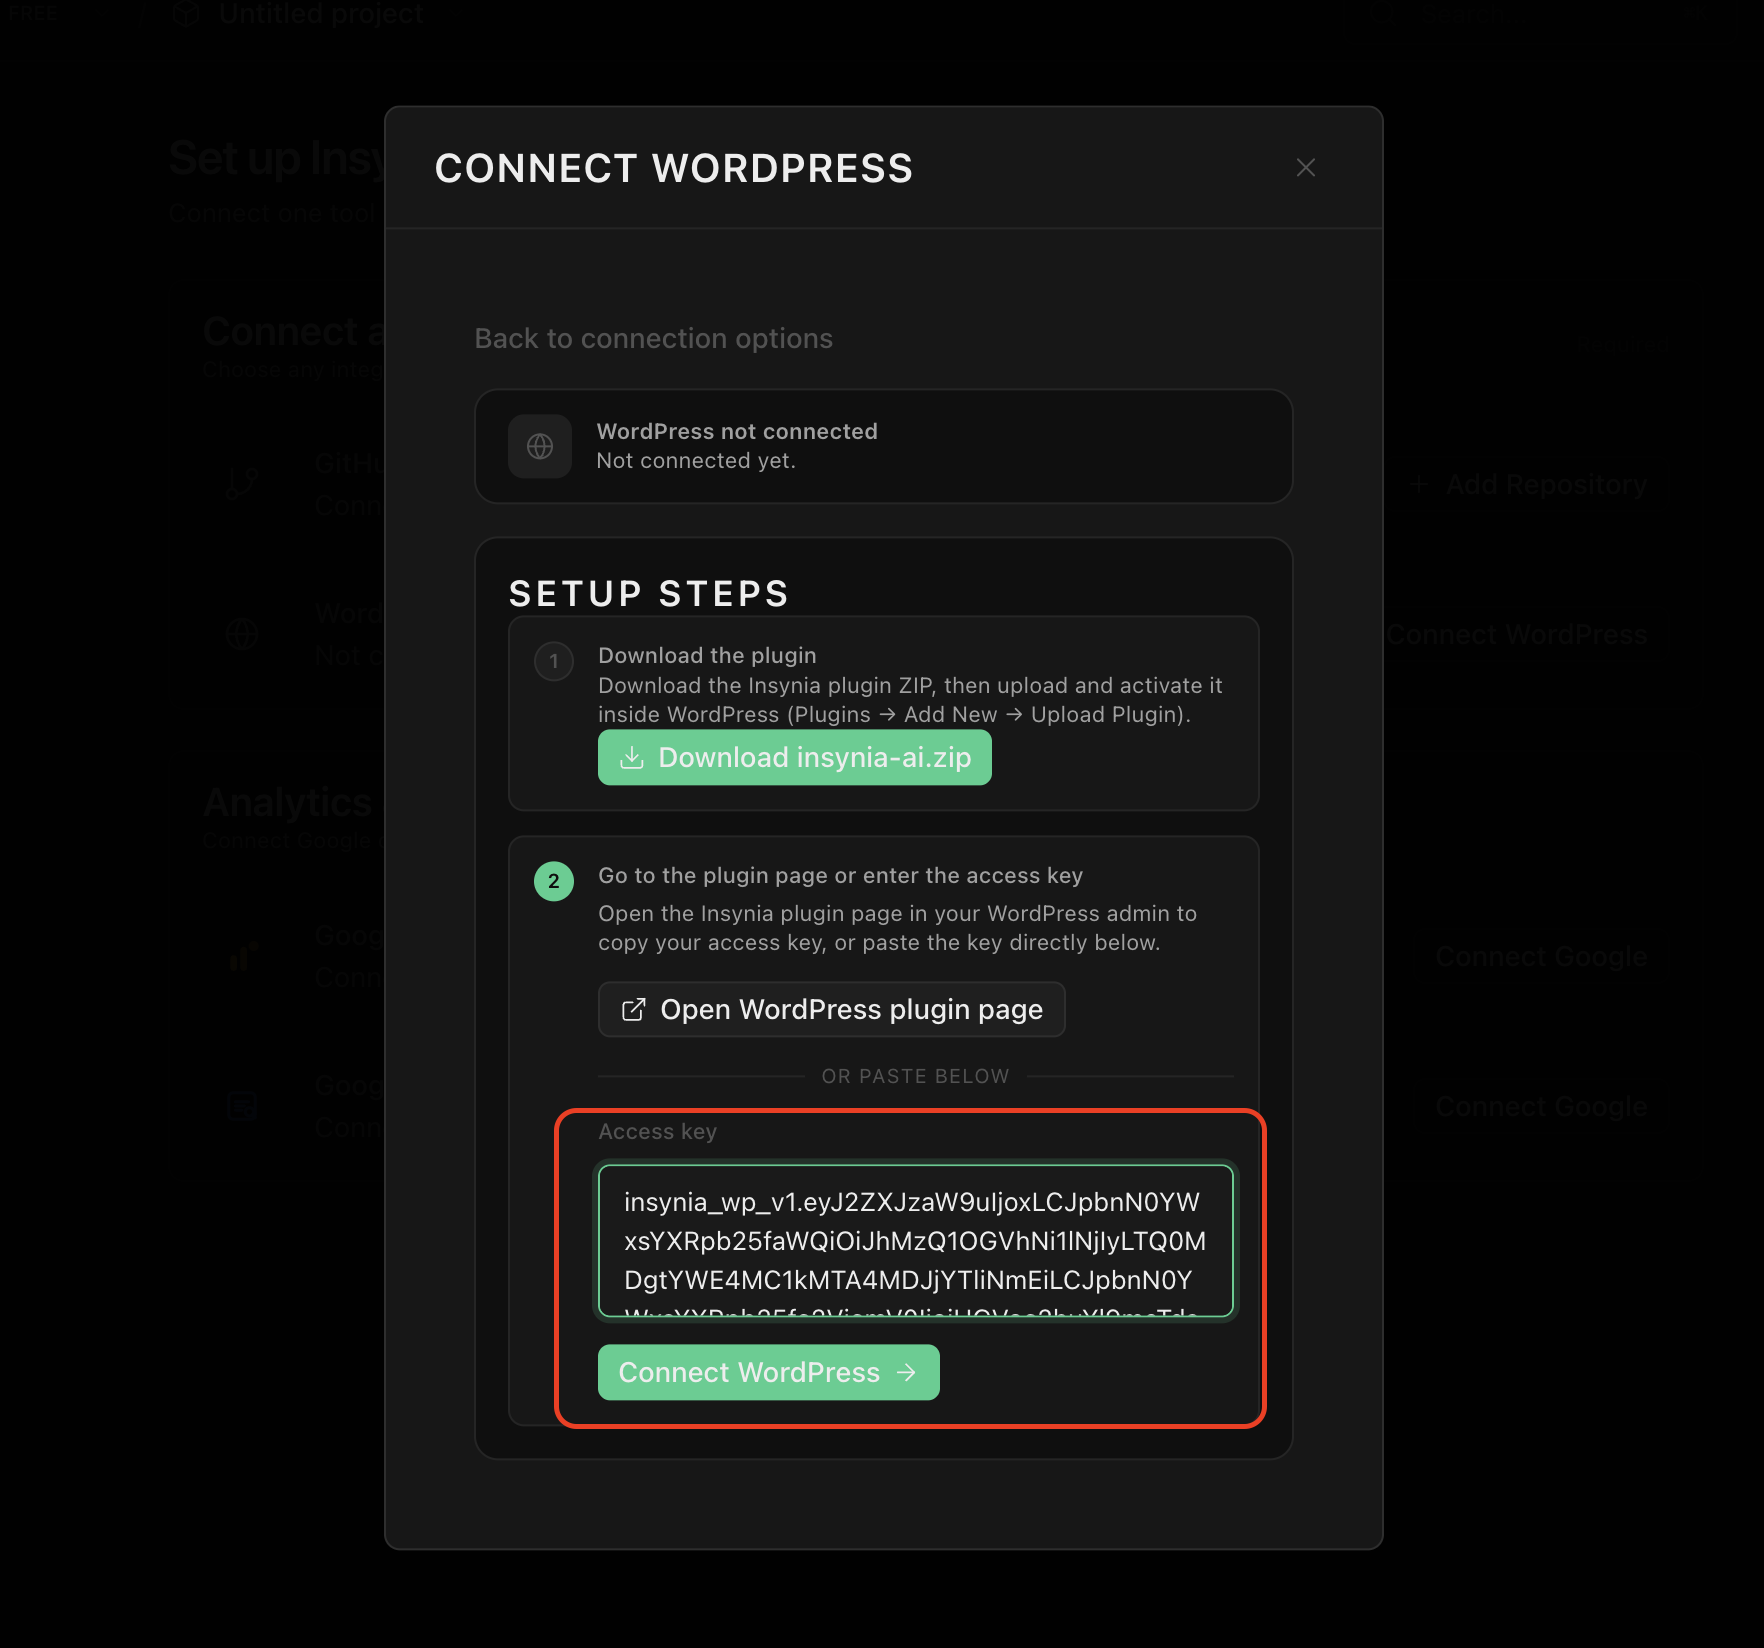
5. Copy your connection token into Insynia
Copy the token shown in your WordPress Insynia panel, then open the WordPress integration page in Insynia and paste it to complete the connection.
- Paste the full token exactly as generated.
- Treat this token like a secret and do not share it publicly.
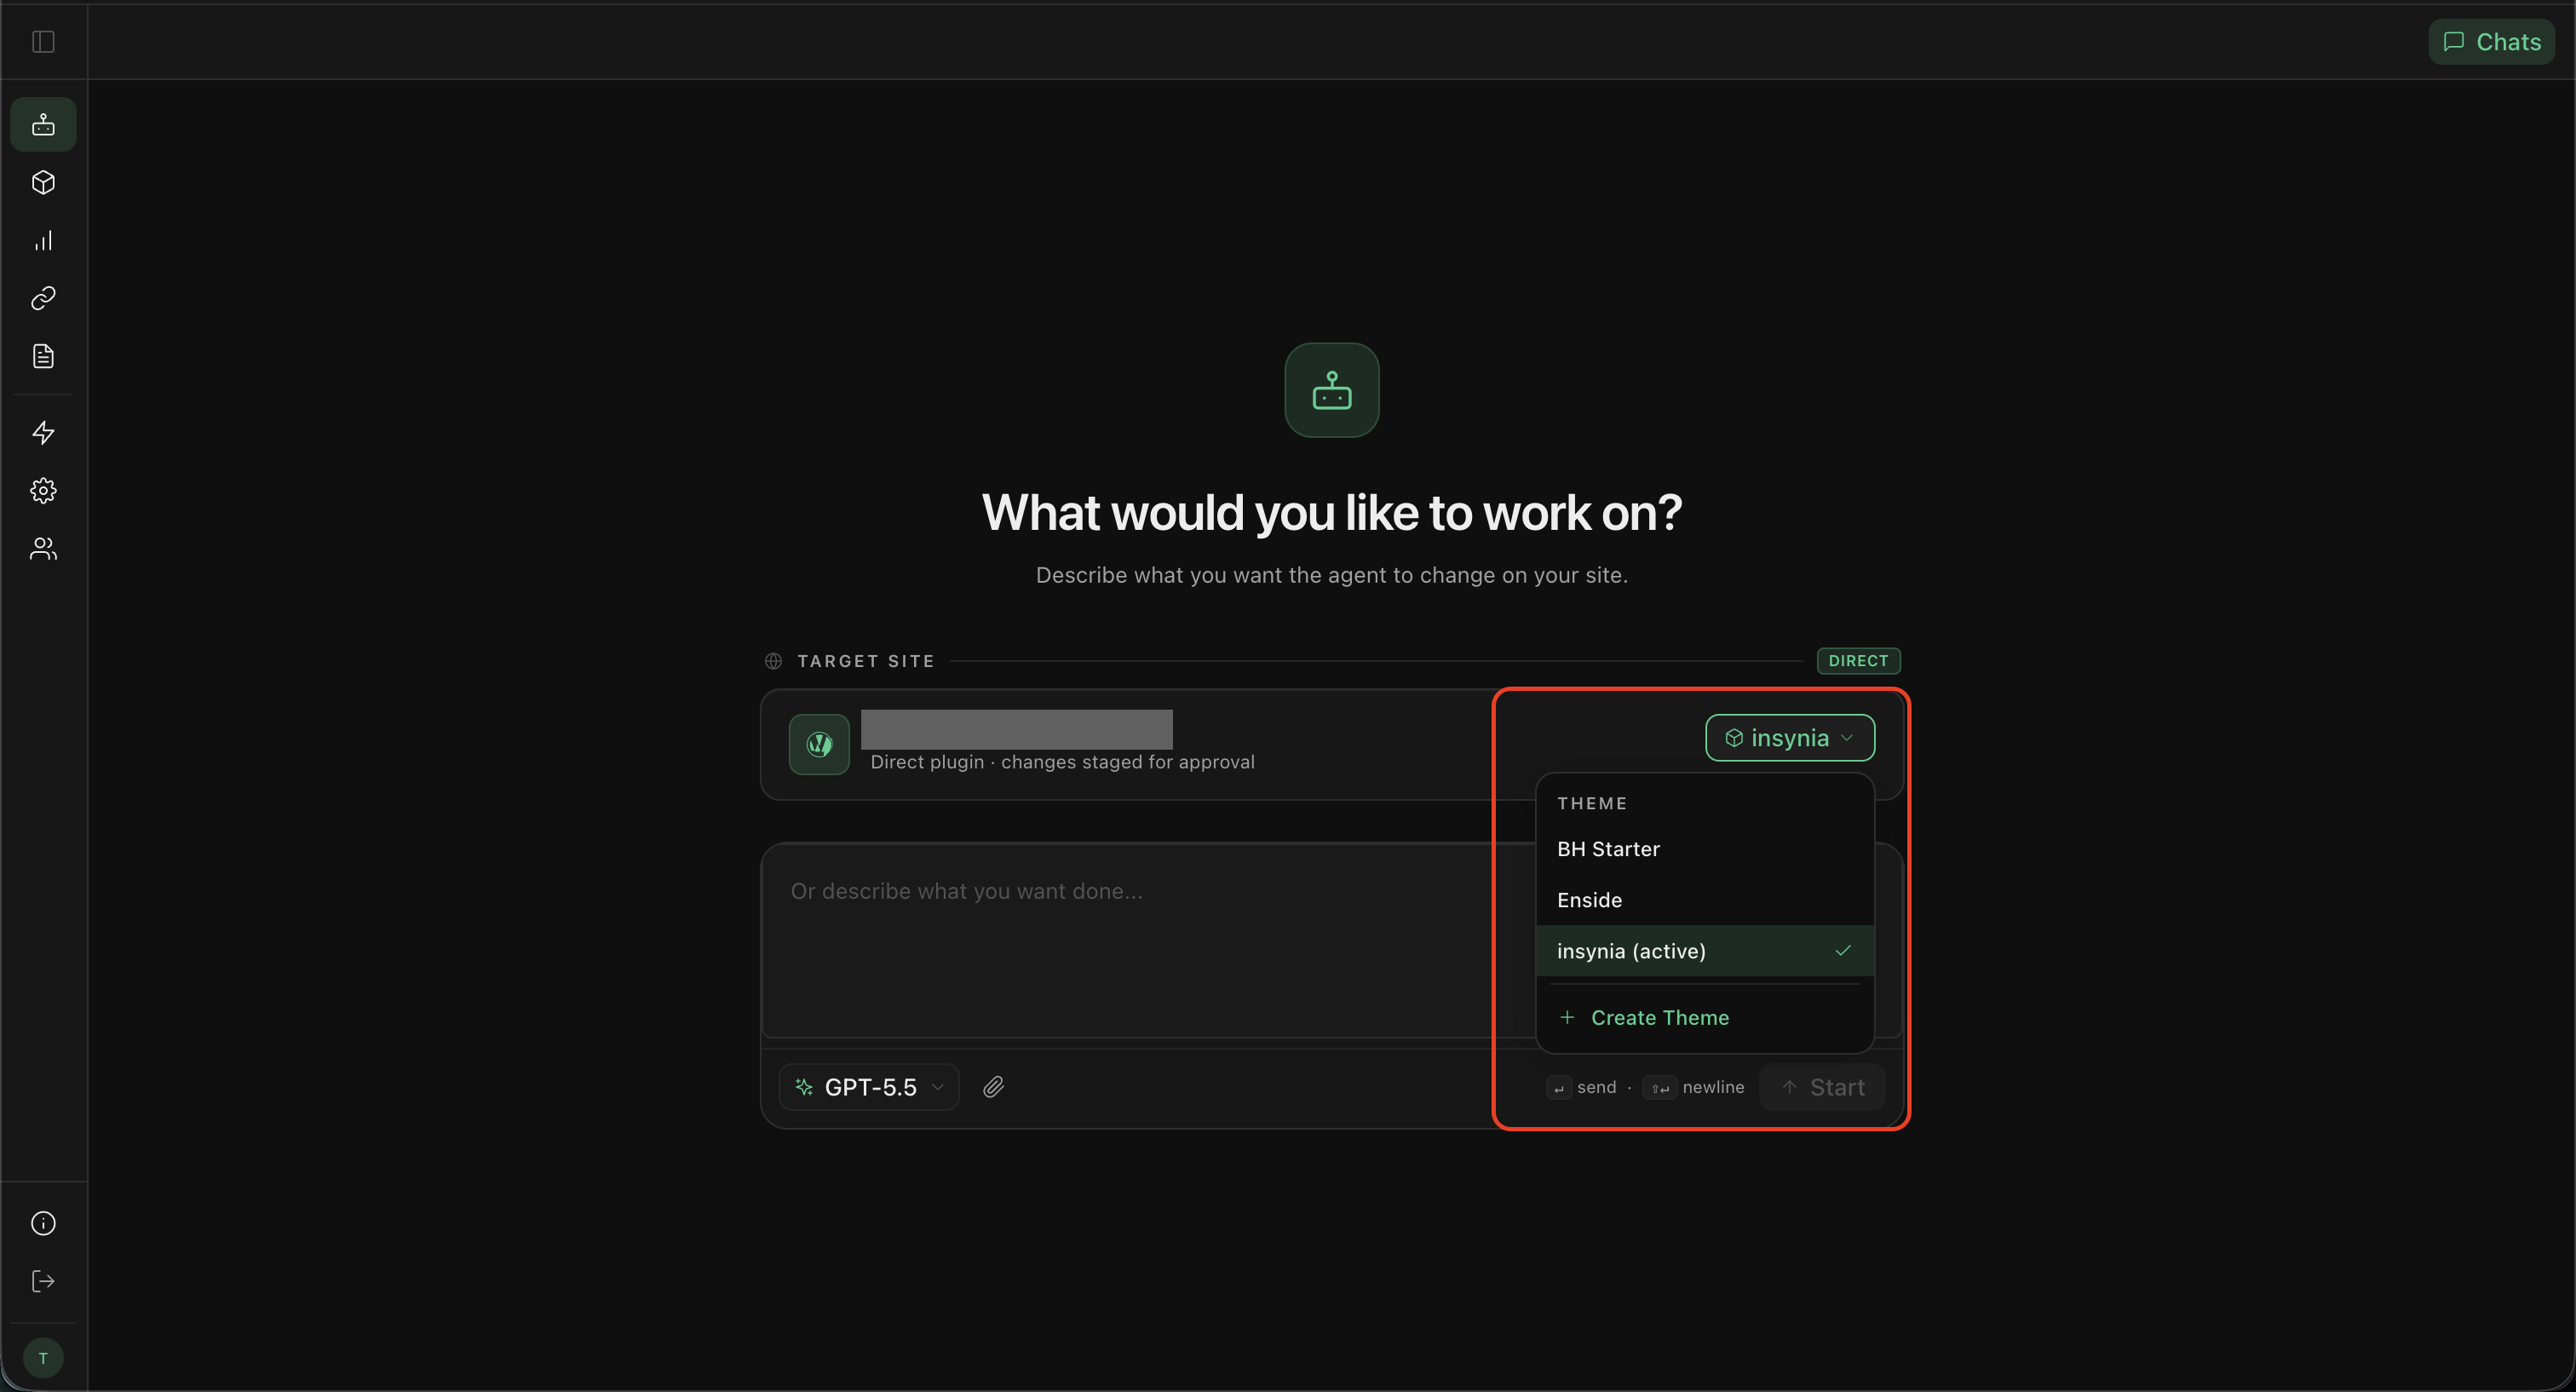
6. Choose your theme path: adapt or create new
Once your first prompt runs, choose how Insynia should continue the redesign. This is where the magic happens.
- Option 1: Work on an existing theme to iterate faster on your current structure and branding.
- Option 2: Create a completely fresh new theme for a ground-up visual system and cleaner long-term design architecture.
Choosing Create new theme gives you more flexibility for future updates: cleaner component structure, easier brand refreshes, and less technical debt from legacy templates.
7. Write your first redesign prompt
Start with a simple instruction in Insynia, or pick one of the suggested prompts. Be explicit about brand style, layout goals, and pages to update.
- Example prompt: Redesign my homepage in a modern SaaS style with stronger visual hierarchy, clear CTA buttons, and a lighter color palette.
- Review generated changes, then publish when everything looks right.